Welcome to my cardboard craft blog

Whether you are just plain bored or simply too broke to purchase other materials; cardboard is free! Cardboard is such a versitile craft medium that you can make just about anything from it. All you need is a little knowledge about different construction techniques to ignite your own art passion for cardboard. This blog is intended to show the construction techniques I use in my own cardboard crafts. When you learn the secrets of creating strength with cardboard you can create whatever you desire. From simple items like picture frames to extremely large pieces of usable furniture; it will all be possible. Travel along with me as I show you the secrets hidden within the cardboard. Go green or save a tree or just to keep it out of a landfill.... whatever your choice of phrases.... start creating your own cardboard art. If you find this blog helpful, please recommend it to your friends.

If you are new to this blog it's best to read the numbered labels first. ie: 1 - What do you see? 2 - Tools you need etc.

In those labels you will find the basic information you need to get started making your own cardboard furniture and crafts.


Sunday, April 3, 2011

Budget cuts

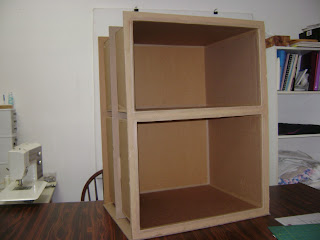
I heard there were alot of changes lately in policy, but didn't realizes it has gotten this far.  Due to recent budget cuts, I'd like to welcome you to your new office cubicle. 


I'd also like you to review our new office policies.


Effective March 14, 2011


NEW OFFICE POLICY

Dress Code:

1) You are advised to come to work dressed according to your salary.

2) If we see you wearing Prada shoes and carrying a Gucci bag, we will assume you are doing well financially and therefore do not need a raise.

3) If you dress poorly, you need to learn to manage your money better, so that you may buy nicer clothes, and therefore you do not need a raise.

4) If you dress just right, you are right where you need to be and therefore you do not need a raise.

Sick Days:

We will no longer accept a doctor's statement as proof of sickness. If you are able to go to the doctor, you are able to come to work.

Personal Days:

Each employee will receive 104 personal days a year.

They are called Saturdays & Sundays.

Bereavement Leave:

This is no excuse for missing work. There is nothing you can do for dead friends, relatives or co-workers. Every effort should be made to have non-employees attend the funeral arrangements in your place. In rare cases where employee involvement is necessary, the funeral should be scheduled in the late afternoon. We will be glad to allow you to work through your lunch hour and subsequently leave one hour early.

Bathroom Breaks:

Entirely too much time is being spent in the toilet.

There is now a strict three-minute time limit in the stalls. At the end of three minutes, an alarm will sound, the toilet paper roll will retract, the stalldoor will open, and a picture will be taken. After your second offense, your picture will be posted on the company bulletin board under the 'Chronic Offenders' category. Anyone caught smiling in the picture will be sectioned under the company's mental health policy.

Lunch Break:

* Skinny people get 30 minutes for lunch, as they need to eat more, so that they can look healthy.

* Normal size people get 15 minutes for lunch to get a balanced meal to maintain their average figure.

* Chubby people get 5 minutes for lunch, because that's all the time needed to drink a Slim-Fast.

Thank you for your loyalty to our company. We are here to provide a positive employment experience. Therefore, all questions, comments, concerns, complaints, frustrations, irritations, aggravations, insinuations, allegations, accusations, contemplations, consternation and input should be directed elsewhere.

The Management

Pass this on to all who are employed!


***** PLEASE NOTE *****
 
Ok, I am not the original creator of these photos and memo.  It is a copy of a copy of a copy of a forwarded message.  You know, one of those emails that gets sent and repeatedly forwarded until the original creator's name is lost.  I simply liked it so much I wanted to share it with you too.  If anyone knows the name of the original creator I will be happy to update this blog post.  I love their cardboard creativity.

Friday, February 25, 2011

Homemade paper paste

Here is a recipe for making homemade paste that can be used for paper coating the pieces of cardboard furniture.  I stumbled upon this recipe in an old cookbook when I was looking for a Carmel pudding recipe. 

Put 1 1/2 cups water, 1/2 cup cornstarch, 4 Tablespoons white corn syrup, and 2 teaspoons vinegar in a pot.  Heat it slowly over very low heat while stirring constantly until it becomes very thick then remove from the heat. 


At this point it needs to be thinned down by adding 1 1/2 cups more water and 1/2 cup more cornstarch.  Stir this together without cooking until it's very creamy.  It will thicken up a bit more as it cools and become more like wall paper paste.


When it's cool enough just put it into a container for use with the furniture paper coating.


If more water is added it will be like a pourable school glue.  One familiar brand name would be Elmer's.  Add the water slowly, a teaspoon at a time to avoid getting it too thin.  I'm going to save a dish liquid bottle to store some of this homemade glue and use it when constructing some of my furniture pieces.    I'll use the thicker version for the paper coatings. 

UPDATE:  This homemade glue should be kept in the fridge and used within a few days.  I wanted to see what would happen if it was left covered on a counter.  Would it last?  This is what I got after a few days.  It had started to grow green hair.


It does work extremely well as a paper paste though.   I noticed I had a lot less paper crinkles with the homemade paste than I get with the regular wall paper paste. 


I'm not sure if bugs will be attracted to the paste or not.  Some bugs are already attracted to paper, cardboard, and glues in other things around a house.  Silverfish bugs love books.  I never had a problem with bugs years ago when I had several cardboard furniture pieces.  I'm thinking the final painted finish on the pieces may have been a deterant to bugs?  I've not heard of any bugs attracted to painted surfaces either.

Wednesday, February 23, 2011

Breakfast bar - section 2 - step 7

Now that my breakfast bar section 2 is constructed, and the joins are all taped, it's time for a paper coating.  I prefer to use old phone books for my paper because it's thinner and easier to apply.  I also want to keep phone books out of a landfill whenever I can.

I tear the pages into irregular shapes so that when my paper coating is finished there are no hard edge lines.  Hard edge lines will create ridges where paint will build up and look bad.  I also overlap them when pasting down.  I go over the corners (from one side to the other) with the paper to create a smooth corner.


A paper coating should be done over the whole thing.  Top, bottom, inside, outside.... the whole thing.  Why?  Mostly for strength but it also creates a good base for painting.  It covers the manufacturing coating on the cardboard and creates a bonding area between the cardboard and the paint used to finish the piece. 

The paper coating also covers the ridges you see in the cardboard.  This means the finished piece will look more like wood and a lot less like just cardboard.


The paper coating will cover areas where you find labels that can't be removed.  The labels have hard edges.


The paper coating will smooth out dints and dings like this one.


It will smooth out the area where the paper tape is applied.


It's best to apply wall paper paste on the cardboard instead of on the paper.  It creates less mess and uses less paste.  I use a 2" paint brush.  Paint a thin coat of paste on the cardboard, lay the paper on the pasted area, and brush it down with the paste coated brush.  This covers the paper with paste and it's ready for the next piece of paper. 

It's best to use a very light coating of paste because too much will cause the cardboard to warp.  Can you see how the ruler is angled up in this photo?  This is because I was in a hurry and used too much paste in this area.  The paste has water in it which reacts with the paper of the cardboard.  I got a bubble from all the paste.  I believe this will flatten out when it dries completely.... but why take the chance?  Don't make the same mistake I did.  Cover a small area and move to another area while the first one dries.


You may find the paper coating crinkles up when you paste it to the cardboard.  Don't worry about that.  It will be fixed later.  Quite a bit of the crinkles will flatten out as they dry.  I deal with what's left after drying.

I prefer to put two coats of paper on my pieces.  It does take longer to do two coats but the piece will look much nicer and last much longer when finished.  The way I think about creating the cardboard furniture is this..... if I take the time to create it in the first place, I need to take the time to do it right.  I want my pieces to be as long lasting as any furniture made from wood.  I'm not just making a homemade cardboard thing.... I'm making a custom made piece of furniture that can be handed down from one generation to the next if carefully cared for. 

I use two different color pages for my paper coatings so I know where I've been.  The first coat on my breakfast bar is using the white page phone book.  The second paper coating will be done using yellow pages. 
It may be several days before I post on this blog again.  Applying the paper coating takes time and right now I don't have a lot of time to devote to cardboard crafts. 

Sunday, February 20, 2011

Breakfast bar - section 2 - step 6

When I stopped working on my breakfast bar (back before Christmas rush) I had just finished putting the walls on the inside of the second section.  As you can see, the outside walls need to be attached. 


This is what the inside walls look like from the side.  The gap you see is where the inside struts are located.  I first cut a piece to be the bottom.  Glued it on by turning the piece upside down, glue the struts, then lay the bottom piece on and weight it until the glue dried.  I repeated this for the sides and the top piece.


You will notice I had a little extra lip on the bottom piece.  This was to allow for the thickness of the side piece.  The side piece is 1/4 inch thick so the lip is 1/4 inch.


I also cut one of the sides too short.  This was easily fixable by simply adding in an extra piece.  I decided to add a top on this section as well.  When I designed the breakfast bar, the counter top was to be one whole piece over all the sections.  Each section was to be topless except for the counter top.

I've decided to change the design and make each section as a stand alone piece but I will also make a one piece counter top to cover all the sections too.  The reason I'm doing the sections differently than the way originally designed is just in case I want to change a section later.  I plan to make the breakfast bar so I can remove one section and replace it with a different one.  The piece I remove can be used in another area of the house without more work.

Now all the walls and top and bottom of this section are assembled.  Time for adding the tape on all the joins.  The tape will cover all the open flutes and give the whole piece strength. 


Before adding the tape I did a little clean up on all the joined areas.  I want the edges (corners) on the outside to be as straight as I can get them.  As near like wood edges as possible.  In some places I use a craft knife to cut some off.


For where I had cut the side piece too short and added another piece, I covered the join with craft tape.  This covers the gap and will not be noticeable when the piece is finished.


On some joins (outside corners) I used a wood rasp to smooth it.  It was just a tiny bit too large on one side.  There was not enough to cut with a craft knife so the rasp took care of it.  Use the wood rasp very lightly until you get a feel for it.


When putting tape over the open flutes of the joins you will need to deal with the corners too.  I put tape on the join going an inch or so beyond the end.


Clip the middle up to the cardboard.


Glue one side down.


Then glue down the other side.


Underneath it looks like this.


Sometimes the paper tape doesn't want to stay down.  It curls up as it dries but adding more water will not make it stick.  This is caused by the coating on the cardboard that's applied during the manufacturing process. 


I simply use a little wall paper paste on the tape and smooth it down.


Some might be tempted to use other types of tape, like masking tape or self sticking packaging tape, but those won't work.  The water based packing tape is the only type tape I've found will stick to the cardboard permanently.  As you can see, even the water based tape has a hard time staying in some areas. 

I buy my water based packaging tape from an office supply store.  The rolls I bought were about $12 for a roll that's 3" wide.  I forget how many yards were on the roll but it was a lot.  It's been a few years since I bought mine.  I pull off a few yards, fold, and cut into three 1" strips using my rotary cutter. 

If you are unable to find this water based tape anywhere, you can substitute narrow strips of paper and wall paper paste but the joins will not have as much holding strength as the packaging tape.  Use a thicker paper,  (magazine cover thickness) or tape twice.

Saturday, February 5, 2011

Welcome new followers

Welcome to my new followers!  Although it's sometimes a long time between my posts, I'm really glad you joined me.  I'm still working on the breakfast bar and taking photos.  I hope to have more photos ready this month.  Making the breakfast bar came to a halt when I got busy with quilting work over the holidays. 

Creating with cardboard is a hobby but quilting is my work.  Work is what pays my bills. 

I plan to make a couple of changes to how this blog works before I get too many posts written.  I want to make it easier to follow the steps and print them out if you want.  I'm not very computer savy so it takes me a little longer to figure out how things work.  Hmm... it also occurred to me.... each time I get things figured out, blogger makes changes.  It's hard to keep up. 

If there is anything unclear with the steps, please let me know.  I tend to loose track of what I've done and what I've written about.  What happens is I will work on a cardboard project taking photos.  The photos are for writing posts of the steps later.  Then I'll have to stop to go do something else for a few days without getting the step posts written. When I come back to the cardboard I've lost my place.  I can't remember what step I finished writing and what still needs to be written.  Do you ever have this happen to you? 

Well anyway, a reminder from a reader is usually enough to help me get back on track with the next step.  Creating is always more fun than writing about creating.  I also have a mother in a nursing home and I babysit my granddaughter while my daughter goes to college classes in the evening which means I can't spend a lot of time type-talking on the computer. 

Thanks again for joining as a follower.  I hope I can make cardboard an enjoyable hobby for you.

Monday, January 3, 2011

Bobbin organizer

January organizing is happening all over everywhere.  I'm doing a lot of organizing myself.  I'm using cardboard to make stuff I really don't want to spend money to purchase.  I could buy some type of bobbin organizer which might work.  More likely it wouldn't work the way I wanted it to and I'd wind up feeling guilty for spending the money but tossing it out anyway. 

Yesterday I decided to organize these bobbins laying loose in a drawer.  These are the M size bobbins that go to my quilting machine.  They constantly slide around in the bottom of the drawer and the threads come loose and tangle.  Well cardboard is free so no guilt if this doesn't work.  I'll give it a try for a few weeks to see if I'm happy with it.


Related Posts with Thumbnails